-
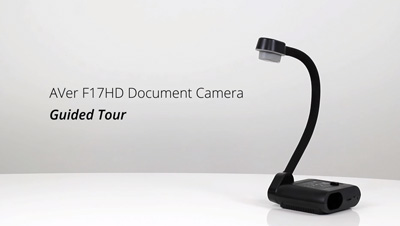
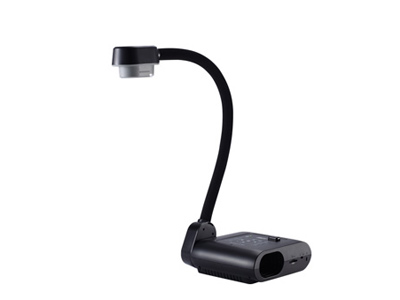
AVer F17HD Document Camera Guided Tour
F17HD Document Camera Downloads
F17HD Document Camera FAQ
Can this product support flip teaching (flipped classroom) where students learn new contents online by watching video lectures at home and apply what they learn in the classroom?
Yes! Through the free AVer software, you can present, annotate, record, and stream lesson plans through sites such as Google Drive, YouTube™, Dropbox™, etc. The F17HD now also supports popular messaging and video conferencing apps such as Skype, Hangout, GoToMeeting, etc.
Can I connect the F17HD to my computer?
Yes, the F17HD can connect to both PC and Mac with a USB Cable.
Can I use VGA in to pass through to HDMI out? What about HDMI in to pass through to VGA out?
The VGA in can only pass through to VGA out (whether powered on or not). The same applies to the HDMI I/O as the HDMI in can only pass through to HDMI out (whether powered on or not).
Is it possible to use the F17HD without a computer?
Yes, the F17HD can connect to a projector or LCD screen using the video outputs.
Does the F17HD have a microphone?
Yes, the F17HD has a built-in mic that makes it ideal for recording lesson plans and presentations.
Does the F17HD have an adjustable neck?
The F17HD has a gooseneck that allows you to lean, bend, and flex the camera in any direction.
Is the F17HD hi-def?
Yes, the F17HD has an adjustable output of 30fps at 1080p.
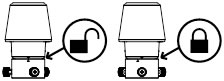
Can the F17HD be mounted?
Yes, the F17HD comes with mounting holes on the bottom of the unit. It also has a Kensington slot on the side of the base for you to secure to a cart or table with a Kensington lock (purchased separately).
Is there a light source on the F17HD?
The F17HD has a built in LED light attached to the camera head that provides light to your presentation when needed.
What is the Shooting Area of the F17HD?
The F17HD has a maximum shooting area of Max. 19.69" x 14.76" (500mm x 375mm).
What is the max zoom of the F17HD?
The F17HD has a maximum total zoom of 32X Digital.
Can you record video with audio with the F17HD?
Yes, you can record video by connecting the F17HD to a computer and utilizing the Sphere2 Software.
Is the F17HD compatible with Interactive whiteboards software?
Yes, with the AVerVision Flash Plug-in downloadable from AVer's website.
What is the highest resolution you can display with the F17HD using your A+ suite software?
The highest resolution the F17HD can output is 1920 x 1080 at 30fps. However you can capture images at up to 5 Megapixels.
Can I capture pictures using the F17HD?
You can capture pictures using the Onboard storage (around 240 jpg 1024x768 size) or insert an SD/SDHC card (up to 32GB)
F17HD Document Camera Troubleshooting
Can the old microscope adapter be used (eg. From an older AVerVision CP-series)?
No, you need the new microscope adapter part# VISIFSEMA.
There is no Camera image on the presentation screen.
- Check all connections again as shown in the user manual.
- Verify the setting of the display output device; make sure it is set to the correct input channel.
- The unit's power light turns Orange in standby mode. Press the POWER button again to turn it ON and the LED Power light will turn Blue.
- The default camera display resolution setting is on 1024X768. If your output device does not support this resolution; no image can be projected.
- Check the TV/RGB switch on the side of the camera and set it accordingly to the type of display device you have.
- Check all cables are good among the display device, AVerVision Document Camera and your PC, replace cables if necessary.
The brightness on the presentation screen is dark and unreadable
- Turn on Auto Image in your unit's Menu (Menu > IMAGE > Advanced > Auto Image)
- Reset your document camera to default by pressing Menu > System > Default > Yes > Enter.
- Make sure there are sufficient lighting in the room or Turn on the LED lamp on your document camera head.
- Manually adjusts the Brightness and Contrast levels in the Camera's Menu.
- Your projector's bulb may need to be changed.
The picture on the presentation screen is distorted or the image is blurry.
- Reset all changed settings, if any, to the original manufacturer default setting. Press MENU then go to SYSTEM > Default and select YES in the OSD menu.
- Use the Brightness and Contrast menu functions to reduce the distortion if applicable.
- If you discover that the image is blurry or out of focus, press the Auto Focus button on the control panel or remote control.
There is no computer signal on presentation screen.
- Check all the cable connections among the display device, AVerVision F17HD and your PC.
- Connect your PC to the AVerVision F17HD first before you power on your computer.
- For notebook, repeatedly press FN+F5 to toggles between display modes and display the computer image on the presentation screen. For different command, please refer to your laptop manual.
The presentation screen does not show the exact desktop image on my PC or Notebook after I toggle from Camera to PC mode.
- Return to your PC or Notebook, place the mouse on the desktop and right click, choose "Properties", choose "Setting" tab, click on "2" monitor and check the box "Extend my Windows desktop onto this monitor".
- Then go back one more time to your PC or Notebook and place the mouse on the desktop and right click again.
- This time choose "Graphics Options", then "Output To", then "Intel® Dual Display Clone", and then choose "Monitor + Notebook".
- After you follow these steps, you should be able to see the same desktop image on your PC or Notebook as well as on the presentation screen.
The AVerVision Software cannot detect the document camera.
- Make sure your USB cable is connected.
- Make sure the USB cable or computer USB port is not defective.
- Move the USB switch on the document camera away from the USB symbol.
- Check your Device Manager, If Digital presenter driver shows damaged, right click and select "Update Driver".
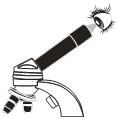
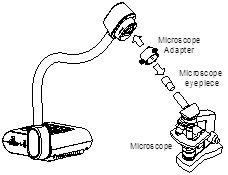
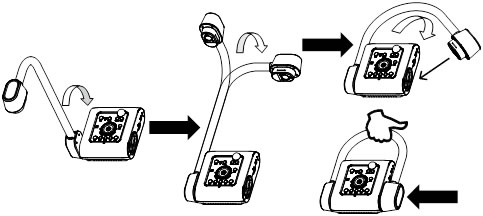
How Do I Connect to a Microscope?
Connect the AVerVision F17HD to a microscope enables you to examine microscopic objects on a big screen. You need to purchase the optional accessory "VISIFSEMA".
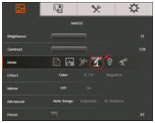
- Change the image display mode to Microscope. Press MENU > select IMAGE tab > select MODE > select
 (microscope) and press
  .
.
- Aim the camera head at the farthest point and press AUTO FOCUS.
- Adjust the focus of the microscope.
- Select the appropriate rubber coupler size for the microscope eyepiece and insert it in the microscope adapter.
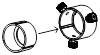
- Remove the microscope eyepiece from the microscope and connect it to the microscope adapter with the rubber coupler inserted. Fasten the 3 bolts until the adapter secures the eyepiece.
For the eyepiece, we suggest using 15.5mm eye relief or higher. - Attach the microscope adapter to the AVerVision camera head. Then connect it to the AVerVision and microscope.
Make sure the arrow on the camera head and microscope adapter are on the same side to connect and twist clockwise for the arrows to meet and lock.
Storing and Handling
The gooseneck design allows you to freely bend the arm and store the camera head in the camera holder. Once you have properly secured the camera head to the camera holder, you may use the arm to carry AVerVision F17HD.
How Do I Transfer Captured Images/Videos to a computer?
This enables you to transfer the captured image from the built-in memory or SD to a computer.
The instruction below MUST be read and followed BEFORE connecting the USB cable.
- Make sure to set the USB switch to
 for the computer to detect AVerVision F17HD.
 - MUST set the USB to PC as STORAGE before connecting the USB cable.
- When "Mass Storage Start…" appears at the lower right corner of the presentation screen, you may now connect the USB cable.
- Upon connecting the USB cable, the system automatically detects the new removable disk. You can now transfer the captured image(s) from the F17HD built-in memory to the computer hard disk.
For more AVerVision F17HD Q&A please visit this page.
How do I turn off the on-screen display of the AVer logo?
To turn off the AVer logo display, press and hold the Left and Menu button for 3 seconds. Repeat this step to re-enable the logo display.